
Photography Composition
Before We Start
My daughter recently asked for a digital SLR for Christmas because she wants to “take better photos.” I explained to her that sure, camera equipment matters, but what matters more is what the person behind the lens does with the camera. It’s about creativity, perspective, and opportunity. We’ve all seen the iPhone billboards touting the camera’s ability to take pretty spectacular photos. So don’t feel like you have to run out and buy a $900 camera to take better photos. OK, now let’s talk photography composition.
1. Rule of Thirds
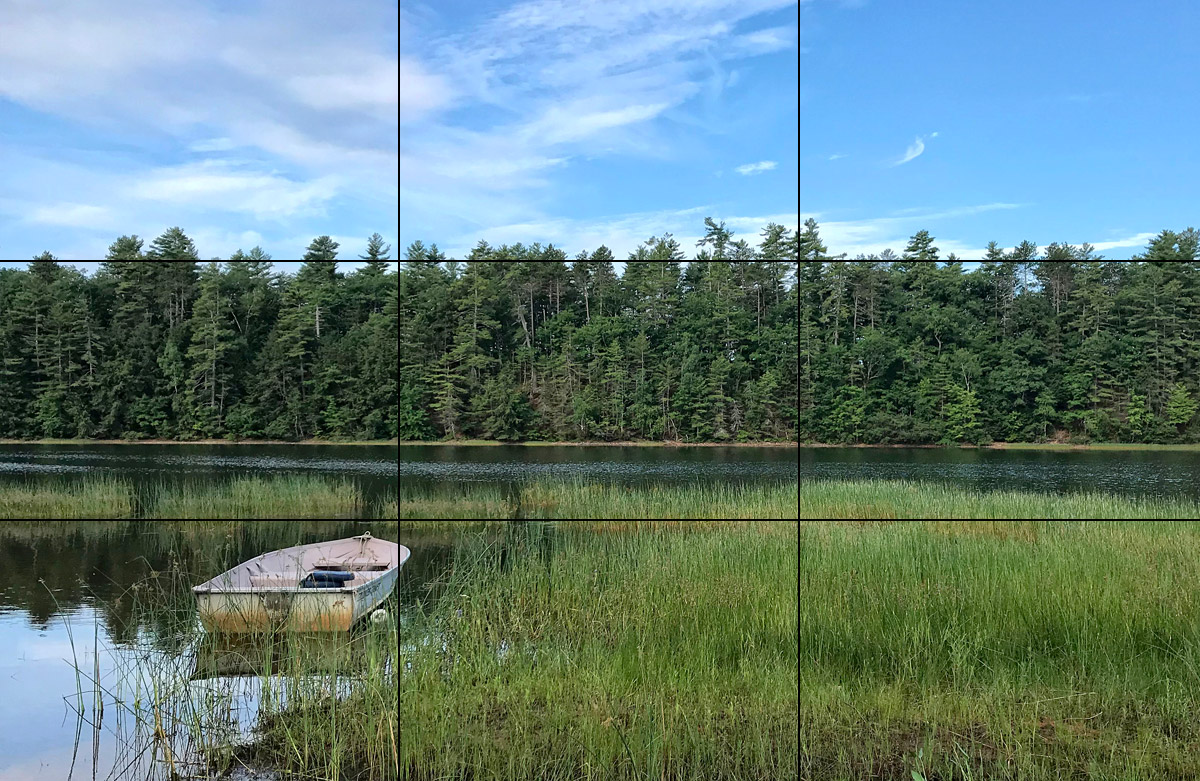
When you look through the lens of a digital SLR camera, you’ll see grid lines forming nine equal boxes. The rule of thirds refers to these grid lines and says that you should position the most important elements in your scene along these lines, or at the points where they intersect. Don’t see the grid lines on your phone? You just need to turn them on. On the iPhone go to Settings > Camera > Grid. On Android, go to Camera App > Settings > Grid lines. Let’s look at the example below.
© Sunshine Urbaniak
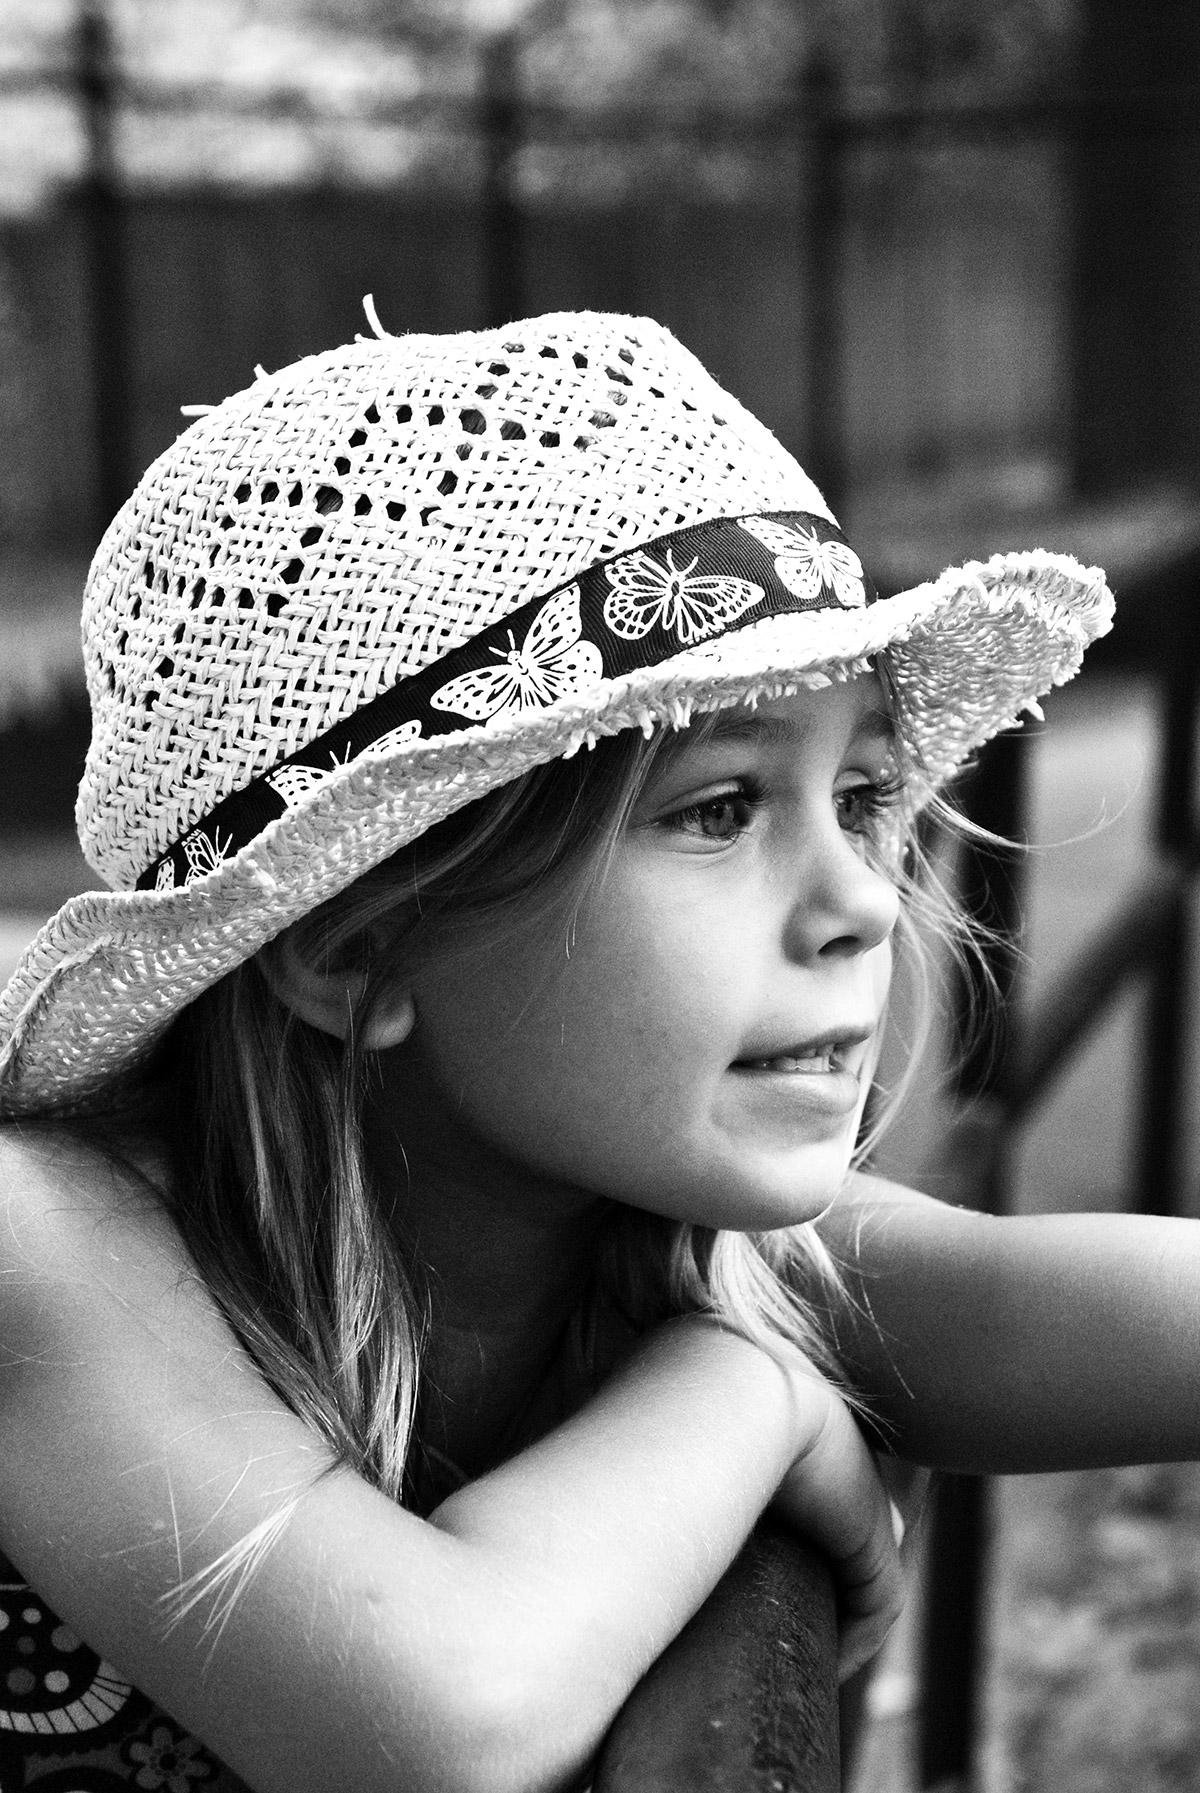
So how do you use the rule of thirds for different types of photos, say landscape versus portrait? With landscapes, it’s usually best to align the horizon along one of the horizontal lines, and if there’s a foreground object, align it near an intersection. Depending on the scene, you can align the horizon with the top line to show more foreground, or the lower line to show more background. For portraits, you off-center the shot and align the eyes on the top horizontal line (see below). Background is also key with portraits, but we’ll talk about that later.

© Sunshine Urbaniak
2. Balance
Balance in photography means one side doesn’t have more “visual weight” than the other. Sometimes when following the rule of thirds you can be left with empty space, causing an imbalance. You can achieve balance with another object, tones, or color. The different types of balance include symmetry, asymmetry, color, and tonal.
Symmetry and asymmetry are pretty simple; symmetry means both sides of the photo have equal weight and may even mirror each other. Usually, the main subject is centered. This type of photo can ignore the rule of thirds. Asymmetry touches on the rule of thirds, where the main subject is off-center. You can balance out the main subject with another object that contrasts with the former in terms of size, color, or general appearance. You can also balance with visual weight. In the photo below, notice how the off-centered boat is balanced by the visual weight of the sun.

© Sunshine Urbaniak
Tonal balance plays a big part in black and white photography. It speaks to the contrast of light and dark areas of the photograph. Similar to bright colors, dark areas have more visual weight, making that area of the photo feel heavy. To balance that out, you need to contrast the heaviness with lightness (see below). Notice how the dark San Francisco Bay skyline and bay balances with the light sky.

© Sunshine Urbaniak
3. Framing
Framing refers to using elements of a scene to create a frame within your frame and can make an image more aesthetically pleasing plus keep the focus on the framed subject. It also helps to create depth in the photo. Examples of physical framing are doorways, windows, arches, tree branches, and water. Non-physical examples are light and shadows, texture and patterns, and focus. Below is an example of physical framing with palm trees. They gently frame the shot, bringing your eye in towards the ancient ruins, accentuating the distance therefore giving depth to the photo.

© Sunshine Urbaniak
4. Background
The background of a photo should either enhance the subject or be an integral part of it. Anything in between will result in a distracting photo. When framing your subject, pay attention to the background. Are there any objects, light, lines, or color that distract the eye from the subject? Does the background help tell the story of the photo or mislead it? By paying just as much attention to the background of your photo as the foreground, you’ll shoot more dynamic photos.
An easy trick to eliminate distracting backgrounds is to throw it out of focus. iPhones now have a portrait mode that automatically blurs the background. Take advantage of this mode when you can.
© Sunshine Urbaniak
5. Cropping
Sometimes photos are taken in a hurry and all the tips mentioned above aren’t used. Luckily with photo editing software such as Photoshop, Lightroom, even Instagram, cropping is a good tool to improve composition. It allows you to correct your photo after having taken it. You can off-center your subject, pull in tighter to enlarge the subject, or reframe the subject. It’s a great way to use the composition tips above for a fun before and after moment. Cropping can transform a photo from average to semi-professional.
Below is an example of cropping to improve photo composition. The left photo is the original. The horizon line cuts the photo in half and the foreground blends with the background making the photo feel flat. The right photo has been cropped to raise the horizon line so it follows the rules of thirds, and by zooming in it adds depth because there’s more contrast between the foreground and the background with the larger body of water.

© Sunshine Urbaniak
RELATED READS

Tips to Improve Instagram Photos
© Sunshine UrbaniakInstagram has great filters and photo editing abilities to take your photos to the next level. Whether you want dramatic changes or subtle improvements, Instagram can help with color and tone, highlights and shadows, and clarity. No matter what...

Kids and Art
"Art has the role in education of helping children become like themselves instead of more like everyone else." – Sydney Gurewitz Clemens I love this quote, but I would word it a little differently so it’s more universal; something like: “Art has the power to help...